Have you just hunted deer recently? Maybe you want to take a trophy of the biggest buck you bagged and display it in your home or give it as a gift.
Fortunately, you can do it on your own even if you’re not a professional taxidermist. To know how to bleach a deer skull by your own is quite a feat to achieve as opposed to having to pay someone to clean it for you.
Simply, the tools are just available in your house, so what’s stopping you?
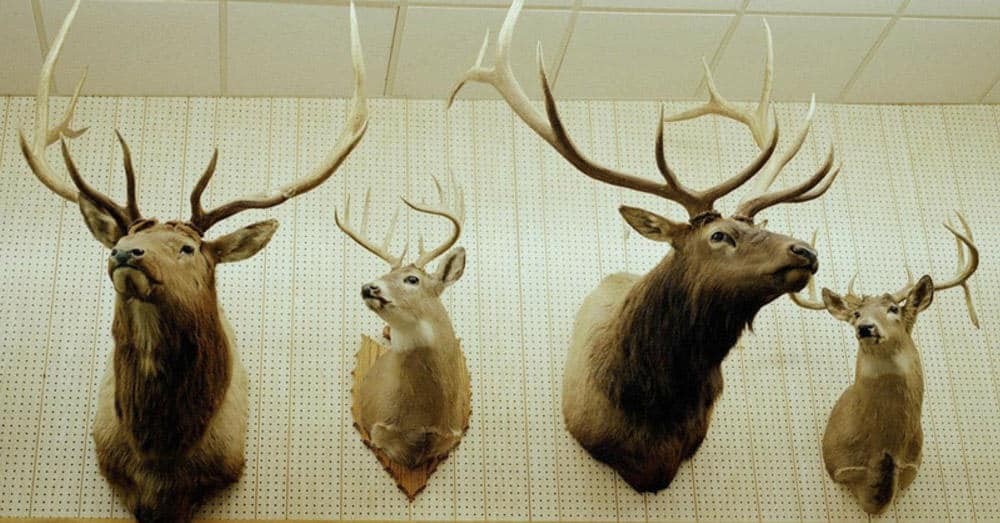
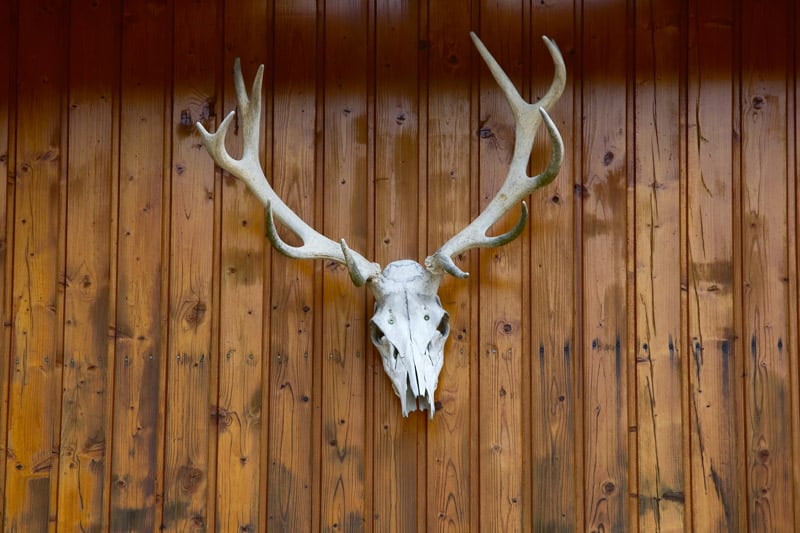
A trophy based on the deer skull has two outcomes. They are the European mount and simply the skull.
European mount means that the antlers are intact while the latter had its antlers removed. Most people prefer European mount as it looks more elegant and more magnificent than just the plain old skull.
In this article, we will show you how to bleach a deer skull, so it appears as white as possible. Furthermore, you can be proud of the work you have done afterward as cleaning skulls are tedious work, begin with, but surely worth your time.
Gather the Materials
First things first, you will have to provide the materials that will be needed in this process.
The overall duration for cleaning skulls from recent game to display trophy would take months, but that surely is fair enough. The things you would need are the following:
1. Latex gloves – Of course, you will be handling a freshly bagged buck, and you don’t want to skin it with your bare hands. The latex gloves will surely protect your hands from unavoidable blood spilling and some tissues that come from the buck.
2. Apron and boots – As cleaning skulls can be quite dirty and messy, you need proper attire so that you could still stay clean after removing them. Best advice available is to wear a plastic apron over your old clothes. The boots will cover your feet from the blood spillage.
3. Large container – This could be a large pot where the skull can fit in fully submerged. You will need this for maceration and for simmering later. It should be made of metal that can be of effect to heat conduction and convection.
4. Old Tongs – Tongs of different sizes are needed for removing tissue and muscles from the skull.
5. Dish wash – You will need this one for degreasing of your skull to clean it well.
6. Bleach or Hydrogen peroxide – People interchange these two, but hydrogen peroxide is largely preferred as it doesn’t damage the bone structure.
In this article, the hydrogen peroxide will instead be used to sanitize and whiten the skull. Using chlorine would have a negative impact on your skull and instead of whitening, it would be just the initial effect and will turn into yellow color afterward.
Bleaching with chlorine leaves a powdery residue and has a permanent effect even if the skull had dried up.
Removing the Meat
This method could either be done by yourself or let nature do it. If you intend to do it on your own, you will need a large knife to separate the head from the body.
You can fill your refrigerator with the meat that came from the deer and indeed, venison is a lump of meat that is packed with nutrients and delicious taste.
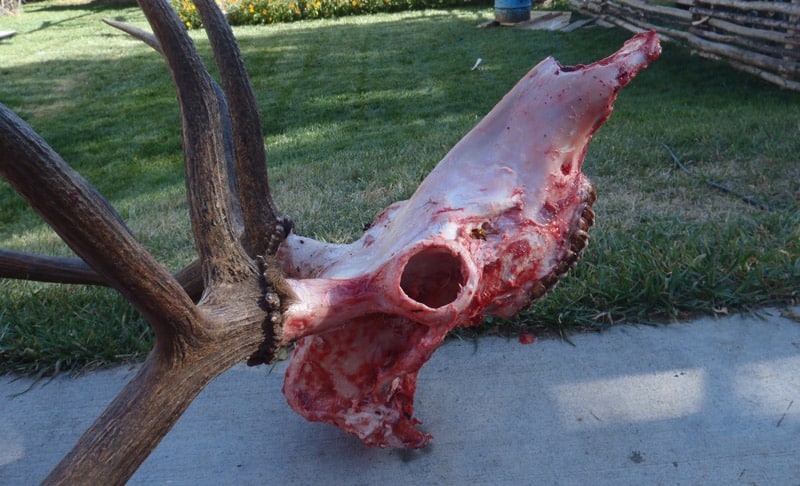
Carefully sever the head from the neck bone with your knife. Not only the bone but you cut away the nerves, veins, and tissues that connect the head with the main body.
Wearing your latex gloves, begin skinning the buck’s head by starting with the forehead. You can even use a scalpel to remove the hide.
Next thing to do is to dislocate the lower jaw from the head.
Once removed, you will have to deal with the brain, eyeballs, and tongue next. Remove the meat and tissue as you can do, until you can see the bone parts.
The brain would be the hard part to remove but you can do it with a clothes hanger and picking the tissue from the small cavity at the base of the skull. Otherwise, you can easily remove it later on by simmering.
If you don’t want anything to do with the skull since it grosses you out big time, have nature do the decomposing process.
Nature does it better than we do. There are three ways to this method and they could either be a burial, open ground or through dermestid beetles.
Some people prefer burying the skull to prevent other bigger predators from damaging the bones. This gives free for all access for worms, maggots, and ants.
The other way is through open ground rotting. This one is susceptible to being carried off by big predators, and the fragile bones could be damaged. You can prevent this by putting it in a cage and have the ants and maggots eat at it.
The sun also speeds up the decomposing process but can bleach the antlers. To prevent that, cover the antlers with a black plastic bag.
The use of beetles by hordes is also effective but could be costly as you need to feed them after the skull. But it is the fastest among the three ways cleaning the head into a plain skull in under a week!
The similarities between burial and open ground rotting are both time-consuming in which the duration could be more than one month.
Also, they tend to be smelly so cover your nose when you go collecting the bones! The easy part is that you can bleach the skull afterward.
Cold Maceration

This is the next step after skinning and removing the meat and tissues from the head. As there would still be small parts of meat and tissues left, soak the bone in a large container full of water.
The bacteria in the water will gather and will eat the remaining flesh from the skull. To achieve this, soaking it at least two months would suffice. We recommend that you do this method in a place where the neighbors can’t smell the foul odor.
As it tends to get reeking, it’s best to change parts of the water with bacteria with a fresh batch. When the remaining meat is soft, it’s ready for the next step.
Cooking the Skull
After harvesting the skull from being soaked for a few months, it’s time to simmer the skull to remove the remaining flesh and also sanitize the skull.
In a large pot with a controllable gas valve, heat up water that fully submerges the head but not the antlers. This is to preserve the dark color of the antlers from bleaching because of the hot water. Pour an enough quantity of dish wash liquid then bring it to a boil.
When bubbles form, turn down the heat to a minimum and dip the skull into it. Simmer the skull for at least 30 minutes. The remaining flesh will then be tenderized and should be easily removed.
Once the time is up, remove the head and let it cool for a while. Don’t let it air dry for too long, though. With small tools for carving such as pliers, screwdrivers, and thin knives shall do the trick of removing the tenderized flesh.
Wear clean latex gloves and start plucking out and removing the residue that has stuck with the bone. Be intricate and careful so you don’t mess the bone structure.
After the first round of boiling, immerse again the skull save for the antlers and cook it for about 15 minutes. Remove it from the water solution and repeat the process of removing until you are satisfied with it.
Bleaching the Skull
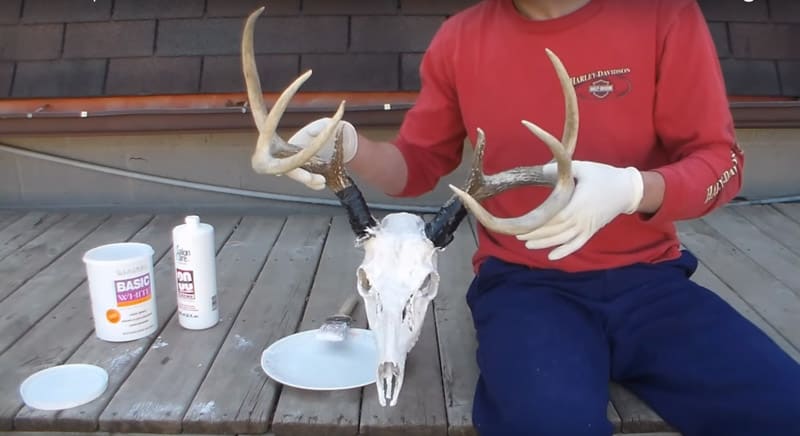
There are many ways in whitening the deer skull. The chemical agent that you will use is hydrogen peroxide and not chlorine to preserve the texture. Hydrogen peroxide has whitening and sanitizing properties.
While the solution still produces bubbles, this means that the hydrogen peroxide is still working. But if you observe that is beginning to cloud up, stop the bleaching so as not to lead to maceration.
You don’t use pure hydrogen peroxide and the ideal composition of it to parts of water should be at most 40%. In whitening, never do the same to the antlers! Antlers should be of its natural color.
Some of the whitening methods that are available are the following:
- Bringing the H2O2 to a near boiling temperature and then submerge the skull into it halfway. With a ladle, splash the top part of the solution several times over.
- Brushing the hydrogen peroxide solution all over the skull excluding the antlers.
- Using soaked paper towels and let it drip all over the skull.
- Soak the deer skull in a plastic container and let it rest for several hours. Place a lid on top of the container but don’t fully close it to permeate bubbles into the solution and air pressure inside.
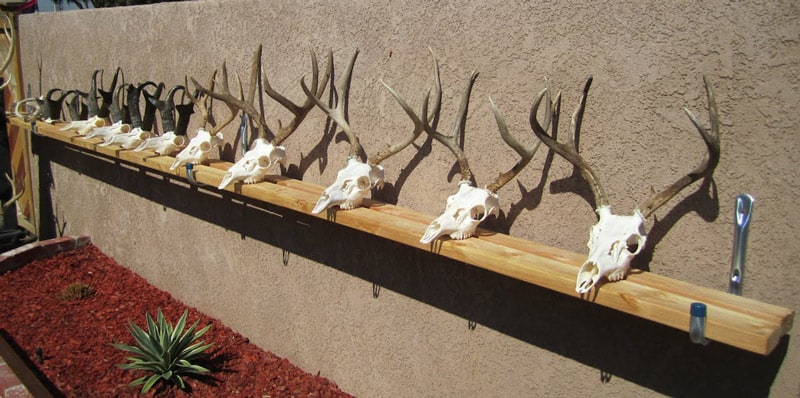
Once you’re satisfied with the color, you can remove the deer skull from the hydrogen peroxide solution. Rinse it well with running water. Allow it to dry under the sun for at least two days before the finishing.
Finishing Process
As there’s no avoiding that some small parts will come off such as teeth, put them back with an adhesive. After that, preserve the skull by spraying it with several coats of polyurethane or a special coat for animal skulls. It is now ready for display on your wall.
Conclusion
The following steps above details how to bleach a deer skull. It is indeed self-rewarding to display a trophy that took you a lot of effort and time to finish!